Showing posts with label Canning. Show all posts

Thursday, May 30, 2013

{Recipe Repost} Strawberry Vanilla Jam


strawberry vanilla jam, strawberry jam


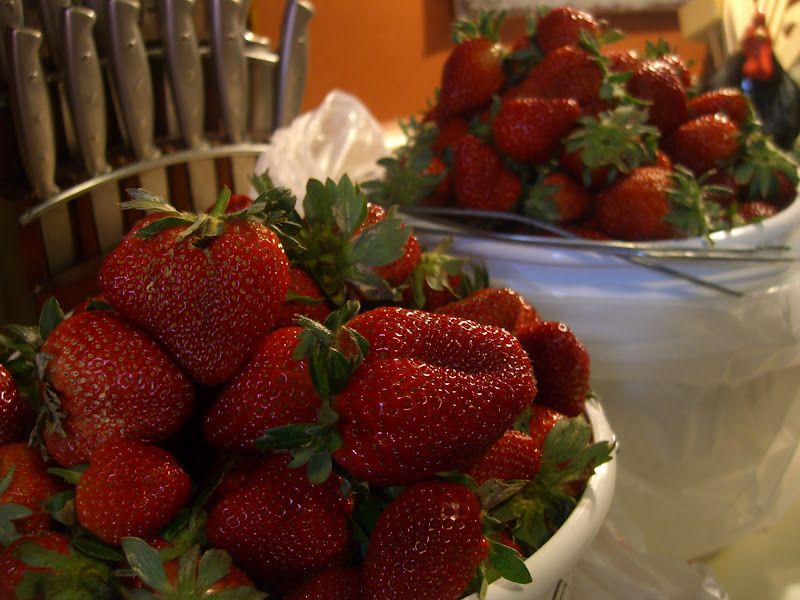
It's strawberry season!  On Mother's Day, we took a trip out to Vollmer Farm in Bunn, NC, to pick local, organically grown strawberries.  The kids always enjoy spending time at the farm (especially the Back Forty playground!).  And back home, I enjoy turning some of our fresh picked bounty into yummy Strawberry Vanilla Jam!


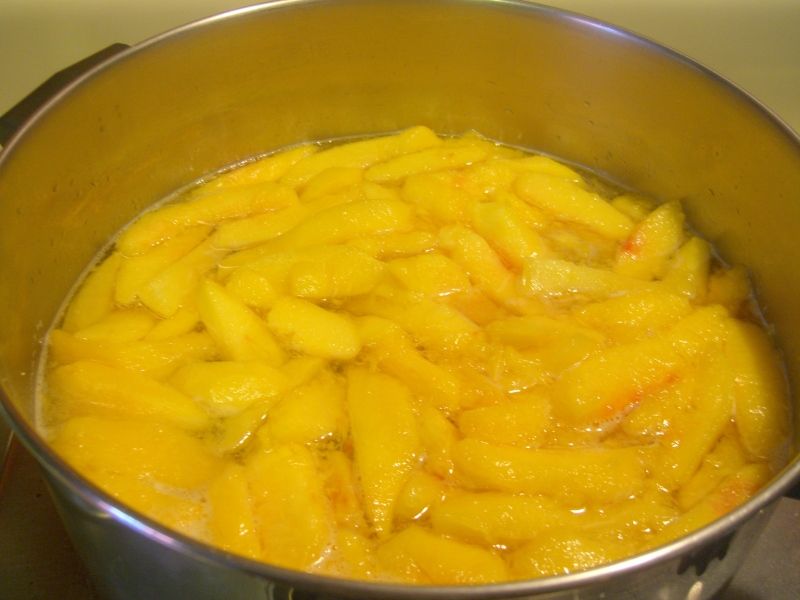
Rinse, hull and slice your strawberries.  You will need 5 cups of crushed berries for the jam.  I add the sliced strawberries to my Vitamix and pulse quickly, working in several small batches until I have the needed amount.  


Add the crushed strawberries to a stainless steel saucepan along with 4 tablespoons of lemon juice, a 1/2 teaspoon of butter (helps to reduce foaming) and half a vanilla bean, split in half lengthwise.  Whisk in pectin (1 - 1 1/2 boxes or 9 tablespoons).  Bring to a full rolling boil over high heat, stirring frequently.   


Next, add 7 cups of sugar (all at once), stirring constantly.  Return the mixture to a full rolling boil that cannot be stirred down.  Boil hard, stirring constantly, for 1 minute.  Remove from heat.  Using a large slotted metal spoon, skim off any foam.  Remove the vanilla bean.

Nota Bene:  Visit the Fresh Preserving website for instructions on how to prep jars and lids and for basic water bath canning procedures.

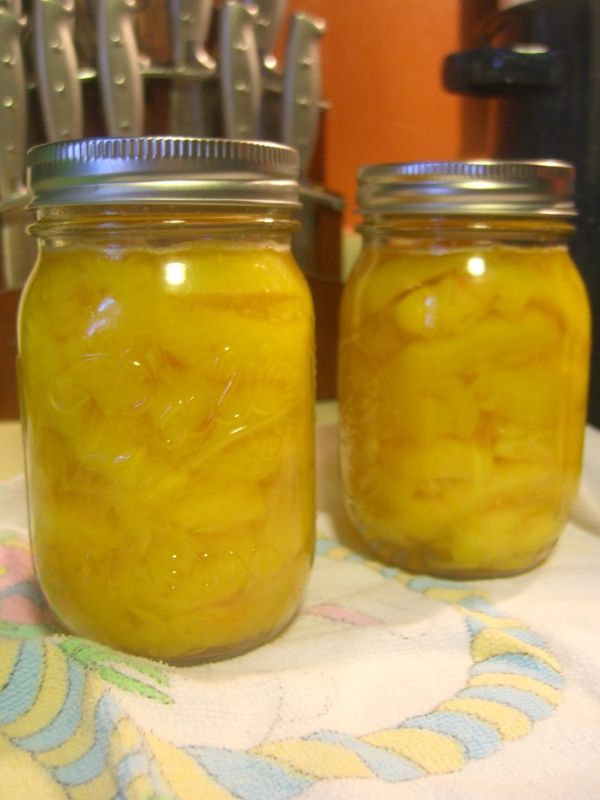
Add hot jam to prepared canning jars, leaving 1/4 inch headspace.

Process jars in a water bath canner for 10 minutes, adjusting for altitude.  When processing time is done, turn off heat and remove the lid from canner.  Allow jars to rest in canner for 5 minutes.  Carefully remove jars from canner without tilting.  Place jars upright on a towel in a draft-free area and let cool, undisturbed for 24 hours.

After 24 hours, check lids for seal before placing in pantry.  If jars did not seal properly, refrigerate immediately or reprocess.  


Mary Ellen

Disclosure

Monday, September 24, 2012

Preserving the Season - Canning Pear Honey


Preserving the season - locally grown pears
Godwin's Orchards, Johnston County, NC

With the change in season, pears have made an appearance at our farmer's market.  Last year, I bought pears from my pastured egg lady.  But this year, her trees didn't produce.  Fortunately, the gentleman I buy apples from also has pear trees.  He offered me a great price on the pears, so I bought the entire basket right then and there!

Interestingly enough, I don't really like pears!  But, I do love pear honey - which is like applesauce (but with pears, of course!) and crushed pineapple.  And despite the name, there's no honey involved.  The finished product just has a golden, honey color - hence pear "honey".  

Pear Honey
original recipe can be found here

3lbs fresh pears, peeled, cored and chopped {you'll need about 7 lbs of whole pears}
3 cups sugar
1-8 oz. can of crushed pineapple in juice
1 tablespoon lemon juice

1.  Combine all ingredients in a large stainless steel saucepan.
2.  Bring to a boil, stirring occasionally.
3.  Simmer for 40 minutes.
4.  Drain some of the cooking liquid and using an immersion blender (or masher), grind pears to a thick, applesauce like consistency.


My new canner - an anniversary present!
This girl loves practical gifts for the home :)

5.  Spoon into prepared canning jars leaving 1/2 inch headspace. 
6.  Process in boiling water for 10 minutes.


I was able to make 7 half pint jars of pear honey - one of which was gifted to the gentleman from the orchid.  He's going to bring more pears to the market next weekend, so I'll be back in the kitchen canning very soon!


Attention Target shoppers...On my last Target trip, I found this box of 12 regular mouth canning lids with bands on clearance for $2.78.  That's the cheapest I've seen for this in our area.  Might be worth a look-see if you're in Target.  Also, tis' the season for discounted school supplies, backpacks and lunch boxes at Target.  Get a start on next year's school supply shopping or stock up for the rest of this school year!

Mary Ellen

Thursday, August 30, 2012

Small Batch Canning - Habanero Gold Pepper Jelly


Habanero Gold Pepper Jelly

1/3 cup finely, sliced dried apricots
3/4 cup white vinegar
1/4 cup finely chopped red onion
1/4 cup finely chopped seeded red bell pepper
1/4 cup finely chopped seeded habanero peppers
3 cups sugar
1 pouch liquid pectin

1.  In a large stainless steel saucepan, combine apricots and vinegar.  Cover and let stand at room temperature for at least 4 hours or overnight.

2.  Prepare canner, jars and lids.

3.  Add red onion, red pepper and habanero peppers to apricots.  Stir in sugar.  Over high heat, stirring constantly, bring to a full rolling boil that cannot be stirred down.  Stir in pectin.  Boil hard, stirring constantly for 1 minute.  Remove from heat and quickly skim off foam.

4.  Pour hot jelly into prepared jars, leaving 1/4 inch headspace.  Wipe jar rim.  Center lid on jar.  Screw band down until fingertip-tight.

5.  Place jars in canner.  Bring to a boil and process for 10 minutes.  Remove jars, cool and store.

*To enhance particle suspension, cool jars upright for 15 to 30 minutes or until lids pop down but jelly is not fully set.  As soon as lids are concave, gently twist and/or tilt individual jars to distribute the solids throughout the jelly.  Do not shake or invert jars!  Doing so might prevent jars from properly sealing.  

(Note:  My jelly was pretty well set once the lids popped.  But, my peppers and onions seemed to be very well distributed throughout the jelly.  I chopped them finely using my food processor and that may have helped with the even suspension).


The recipe yielded 3 and half pint jars of jelly for me.  I placed the half jar in the refrigerator for immediate use, instead of processing.  We scoffed it down with some cream cheese over dinner!

This was my first time using liquid pectin while canning.  Very simple and just a slightly different procedure than powdered pectin.  With powdered pectin, you add the sugar in after the fruit and pectin has come to a full rolling boil.  With liquid pectin, you add your sugar in with fruit at the start.  Bring the fruit and sugar to a full rolling boil.  Then, add the liquid pectin and boil hard for 1 minute.  My jelly seemed to set better with the liquid pectin (didn't need to do the sheet test).  So, I might just try it with my other jam and jelly recipes.

Happy Canning!

Mary Ellen


Thursday, August 16, 2012

Canning Sliced Peaches (Hot Pack Method)


Local Peaches from the Sandhills of NC

Peach season is winding down in our area.  But, before they disappear from our market for the season, I wanted to try my hand at canning sliced peaches. 


To remove the skins, rinse the peaches then drop them in a pot of boiling water for a minute or until the skin starts to crack. Next, quickly move them to an ice bath.  The boiling did make the skins a little easier to remove.  Though mine didn't seem to come off as easy as the illustrations from here!  I probably should have left them in the boiling water a little bit longer.  After the skins are removed, pit and slice the peaches.  To prevent my sliced peaches from browning, I sprinkled them with Fruit Fresh (a produce protector containing ascorbic acid - Vitamin C).  


Next, prepare a simple syrup.  The Ball Complete Book of Home Preserving: 400 Delicious and Creative Recipes for Today recommends using a medium or heavy syrup for peaches canned using the hot pack method.

For medium syrup - 3 1/4 cups granulated sugar + 5 cups water
For heavy syrup - 4 1/4 cups granulated sugar + 4 1/4 cups water

Combine the sugar and water in a stainless steel saucepan.  Bring to a boil over medium-high heat, stirring until sugar is dissolved.  Reduce heat to low and keep warm until needed, taking care not to boil the syrup down.

Once the syrup is prepared, add sliced peaches and warm until heated through (mine took about 5 minutes).  


Using a slotted spoon, fill prepared canning jars with warmed peaches leaving a 1/2 inch headspace.  Then, ladel hot syrup into jars to cover the peaches leaving 1/2 inch headspace.  Remove air bubbles and adjust headspace if needed by adding hot syrup.  Wipe rim of jar, center lid and screw band down until fingertip-tight.

Process jars in a water bath canner - 20 minutes for pint jars and 25 minutes for quart jars.

This truly was small batch canning for me, as my 1/2 peck of peaches yielded only 2 pint jars of canned sliced peaches.    


Mary Ellen

Wednesday, July 11, 2012

Small Batch Canning - Peach Jam


Local peaches from the Sandhills of NC

The past few weeks, we've been enjoying these delicious peaches from the farmer's market.  Of course, I couldn't let this seasonal summer treat pass without making a little bit of jam!

Traditional Peach Jam


4 cups finely chopped, pitted and peeled peaches {I pulsed the fruit in my Vitamix being careful not to puree}

2 tablespoons lemon juice

1 package powdered pectin {I always use 1 full package and half of another}

5 cups sugar 


1.  Prepare canner, jars and lids.


2,  In a large, stainless steel saucepan, combine peaches and lemon juice.  Whisk in pectin until dissolved.  Bring to a boil over high heat.  Add sugar all at once and return to a full rolling boil, stirring constantly.  Boil hard for 1 minute.


3.  Remove from heat and skim off the foam.


4.  Ladle hot jam into hot jars, leaving 1/4 inch headspace.  Remove air bubbles using a nonmetallic utensil.  Wipe the jar rim and center the lid on the jar.  Screw band on jar until fingertip-tight.


5.  Place jars in canner and process for 10 minutes.


Mary Ellen


Tuesday, April 17, 2012

Small Batch Canning - Strawberry Vanilla Jam


Local, organic strawberries from Vollmer Farm

Canning is becoming one of my favorite ways to preserve seasonal goodness!  Even as a working mom, I've found canning to be a wonderful (and useful) hobby that I can do in the evenings after work or on the weekends.  Last Friday to kick off my weekend, I decided to can some jam using some of the strawberries we picked from Vollmer Farm.  I used the recipe for "Traditional Strawberry Jam" from the Ball Complete Book of Home Preserving.  


The recipe calls for 5 cups of crushed strawberries.  Instead of crushing the berries by hand with a potato masher, I used my Vitamix.  Just a quick pulse on low up to speed level 2 or 3 until the strawberries were finely chopped, but not pureed. 


For something different, I tried one of the variations listed with the recipe.  I added half of a Madagascar vanilla bean, split lengthwise, to the strawberries while they cooked.  The bean is removed prior to transferring the jam to jars.  But, it imparts a subtle vanilla flavor to the jam.
 

The best part of canning strawberry jam, having homemade lemon pancakes topped with strawberry vanilla jam the next day for breakfast!  YUM!


Strawberry Vanilla Jam
Recipe from Ball Complete Book of Home Preserving
(Can also be found online here at the Ball Fresh Preserving website)

5 cups crushed strawberries
1/4 cup lemon juice
1 box of pectin {I always use 1 full box of pectin and half of a second}
7 cups sugar
half of a vanilla bean, split lengthwise
1 tsp butter {optional - but adding butter to the berries prior to cooking cuts down on the amount of foam generated during boiling}

 -Combine strawberries, lemon juice and vanilla bean in a 6 to 8 quart saucepan.  Stir in pectin until dissolved.  Bring strawberries to a full rolling boil over high heat, stirring constantly.

-Add in entire amount of sugar and stir to dissolve.  Bring mixture back to a full rolling boil.  Boil hard for 1 minute, while stirring constantly.  Remove from heat and skim off any foam.  Remove vanilla bean.

-Add hot jam to canning jars leaving 1/4 inch headspace.  Process in a water bath canner for 10  minutes, adjusting for altitude.  When processing is done, remove jars from canner and allow to cool for 24 hours.  Check seal before placing cooled jars in the pantry.  If jars did not seal properly, the jam must be refrigerated immediately or reprocessed.

*This recipe yielded 5 half pint jars and 2 pint jars of jam for me.

Mary Ellen


(Note:  This post contains affiliate links.  Read my disclosure policy here).


Monday, January 16, 2012

Grape Jelly Update & Homemade Biscuit Recipe


Jelly Biscuit - yum!

The grape jelly I made from grape juice has been working out really well!  So well, I canned another batch of jars this weekend.  When I opened my first jar at room temperature, it had a decent soft set to it.  Once refrigerated, it firmed up similar to store bought jelly.  So, I think I made the right decision to increase the amount of pectin called for in the original recipe.  The homemade jelly has a great taste and we've been enjoying it on peanut butter & jelly sandwiches as well as warm homemade biscuits (see recipe below!).

About the sugar...I'm sure you'll notice the grape jelly recipe (as well as other recipes for jams, jellies and preserves) calls for quite a bit of sugar.  The sugar works with the pectin to help with gelation and also acts as a preservative.  But if you prefer less sugar in your life, there are no sugar/low sugar pectins available.  Sure-Jell makes a no sugar pectin (it's in a pink box) as does Ball.  And according to their website, Pomona's Universal Pectin can be used for no sugar recipes or with natural sweeteners like honey and stevia.      


My Momma's old biscuit pan
- it's older than I am!

When it came to making biscuits from scratch, my Momma was one of the best! I remember on one occasion we had a lady over for Sunday dinner who was visiting from out of town.  She was so impressed with my Momma's biscuits, she asked my Momma to bake her a pan, freeze them and mail them to her in Ohio!  And my Momma did!  It's my understanding, the lady ate all the biscuits except for one.  Which she kept in her freezer as a reminder of the best biscuits she'd ever eaten.  True story!

My Momma seemed to intuitively know how much flour, shortening and milk she needed for her biscuits to turn out just right.  I'm not there yet!  For our jelly biscuits, I used this recipe for baking powder biscuits:


Baking Powder Biscuits
from The Modern Family Cookbook, Meta Givens (1953)

2 cups all-purpose flour
3 teaspoons baking powder
1/2 teaspoon salt
1/3 cup shortening
3/4 - 7/8 cup milk

Sift together flour, baking powder and salt into a mixing bowl.  Add shortening and cut into flour with pastry blender or fork until particles are the size of rice grains.  Add milk and stir until dough stiffens up.  Turn out dough on a floured counter, knead, then roll out to 3/8 to 3/4 inch thick.  Cut out with a biscuit cutter dipped in flour (I used a half pint mason jar as a cutter).  Place on greased baking pan and brush tops with melted butter.  Bake in 450 degree oven for 10 to 15 minutes, or until golden brown.  

********

Be sure to enter my giveaway for a copy of The Money Saving Mom's Budget!  Click here for details.  


Mary Ellen

Monday, January 9, 2012

Small Batch Canning - Homemade Grape Jelly from Grape Juice


How do you go from grape juice to homemade grape jelly?  It's easier than you think!  Last Wednesday, I picked up a bottle of concord grape juice at Harris Teeter Super Doubles for $1.29 after coupon. The kids don't care much for grape juice, but they love grape jelly.  So, I set about to turn my juice into jelly.

To make my grape jelly, I used this recipe from the Sure-Jell website:

Homemade Grape Jelly
yield 6 - 7 half pint jars

3 cups grape juice (the juice I used contained no HFCS, but that's a personal preference)
1 cup water
1 - 2 boxes Sure-Jell pectin (the recipe calls for 1 box, but I ended up using 1/2 of a second box)
1/2 tsp butter
4-1/2 cups sugar

 Add grape juice and water to a 6 to 8 quart pot.  Add pectin to the juice mixture.  Then add butter (it reduces foaming).  Bring to a full rolling boil (a boil that can't be stirred down).  Add sugar and return mixture to a rolling boil.  Boil for 1 minute while stirring constantly.  Remove from heat and skim off any foam with a metal spoon.    


Ladle mixture into prepared canning jars and process in a water bath for 5 minutes.  To prepare the canning jars, I followed the instructions in the guide book from my Ball Discovery Home Canning kit.  The kit comes with canning instructions, recipes, jars and a canning rack with lifter basket that can be used in any large pot.  Great for beginners - like me!  You can also find  instructions on the Ball website. 


I let my jars sit out overnight to cool.  When I picked one of the jars up this morning, it seemed to have set pretty well.  I just ran out of store bought jelly this morning while making the kids' school lunches.  So, I'll be testing out one of the homemade jars in the very near future.  I'll let you how the end result turned out! 


Mary Ellen


(Note:  This post contains an affiliate link.  Read my disclosure policy here).


Thursday, October 6, 2011

Small Batch Canning for Working Moms - Jalapeno Pepper Jelly


Local, organically-grown green peppers and jalapeno
peppers from Wild Onion Farms, Johnston County

This past weekend, I gathered up my canning supplies and went to work on putting up a few jars of Jalapeno Pepper Jelly.  I had pepper jelly for the first time last year when one area business was sampling products made locally.  I like green peppers but had never imagined them in jelly form!  To my surprise, I loved it!  So while peppers are still plentiful at our farmers market, I thought I'd give canning some of my own pepper jelly a shot.   


Jars of pepper jelly ready for the pantry

I can't wait to enjoy a spoonful of pepper jelly on top of a cracker with some cream cheese!

Recipe Notes:  I used the Jalapeno Pepper Jelly Ball canning recipe found at the blog, Love Being In My Southern Kitchen.  I did not add green food coloring to my jelly - I love the natural green!

Mary Ellen