Showing posts with label Eating Local NC. Show all posts

Friday, June 14, 2013

In The Garden & Slug Beer Trap Success!


square foot garden, pepper plant

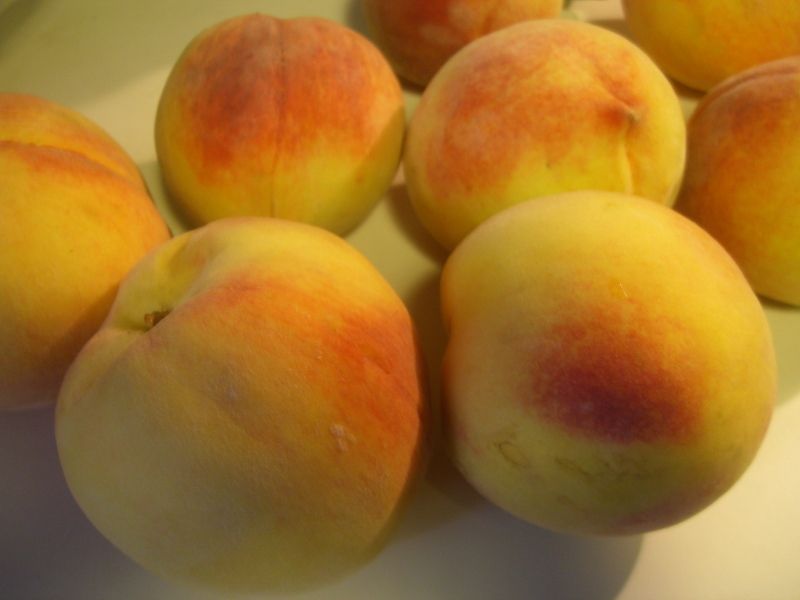
So far, so good with this year's Spring/Summer garden!  I'm always cautiously optimistic when it comes to gardening.  I've yet to figure out how to produce large bounties of home grown vegetables in my backyard.  The perfectionist in me however, won't stop trying!  I still have more herbs to plant (got a late start this year).  But, the vegetables are all in place.  Yellow and Patty Pan squash; Roma, Grape and Big Boy tomatoes; Zucchini and Red, Green & Yellow Bell peppers and Jalapeno peppers.

square foot garden, pepper plant, bell pepper

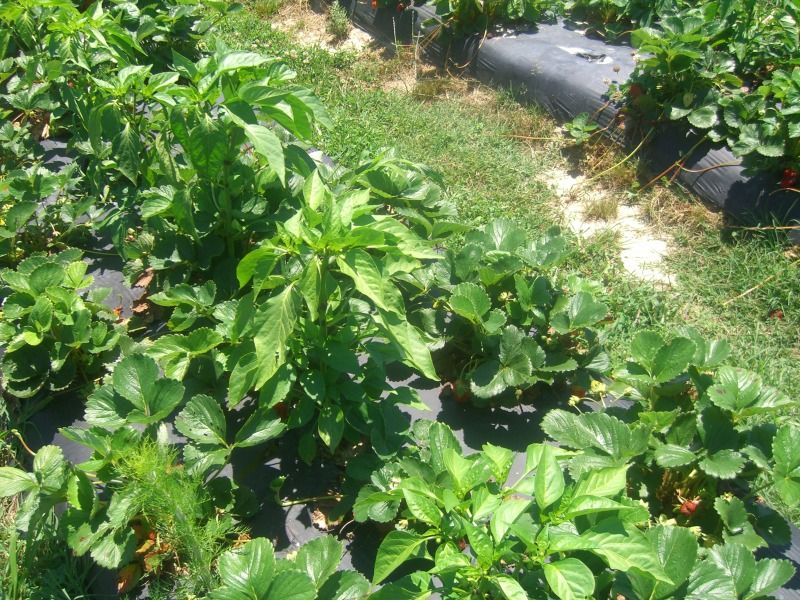
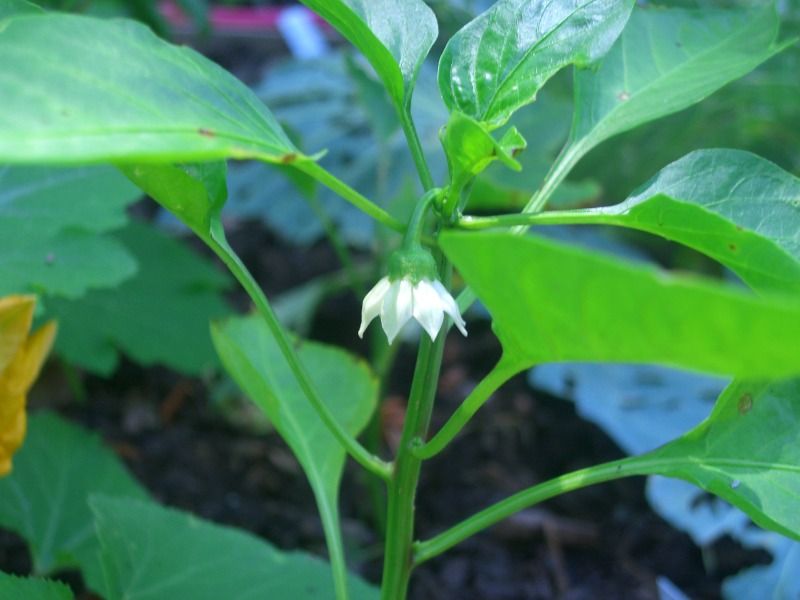
This has been my best year with the peppers.  Typically, I plant them alongside the tomatoes.  This year, the tomato and squash plants went in first.  So, the peppers were moved to my second garden square.  The pepper plants seem to be doing much better in other square.  They're growing bigger and haven't suffered from slug damage.  One of the pepper plants even produced a teeny, tiny pepper.  Fingers crossed for regular sized peppers later!

square foot garden, zucchini plant

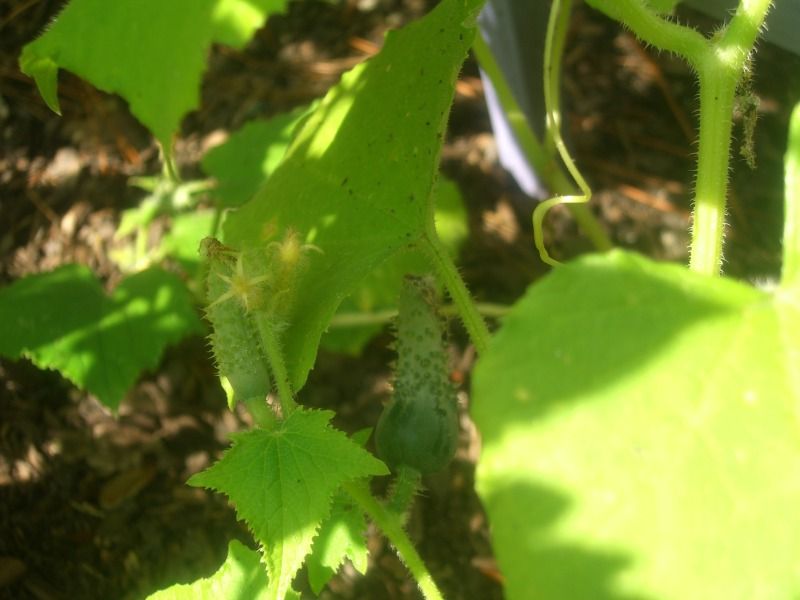
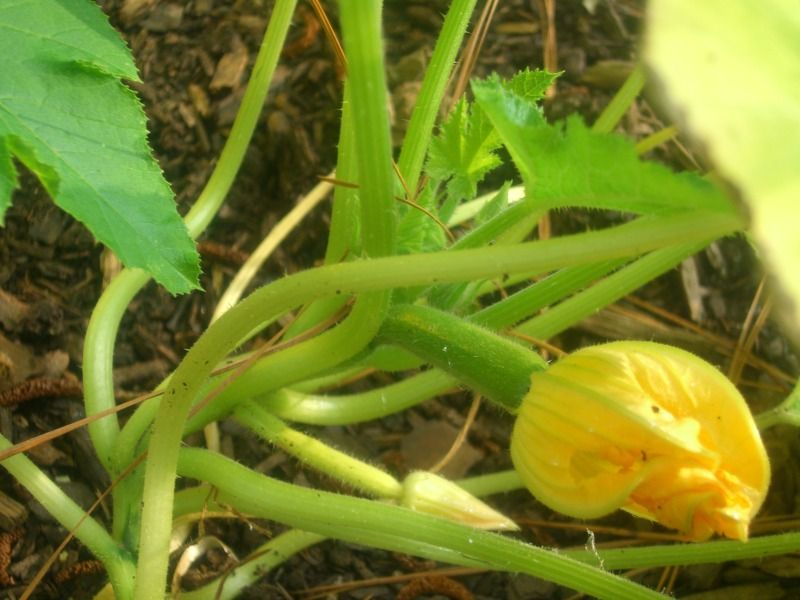
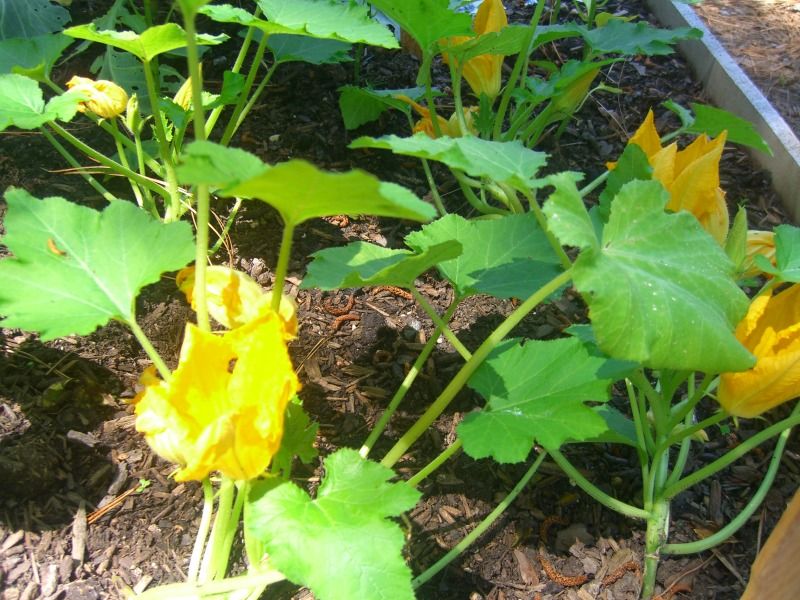
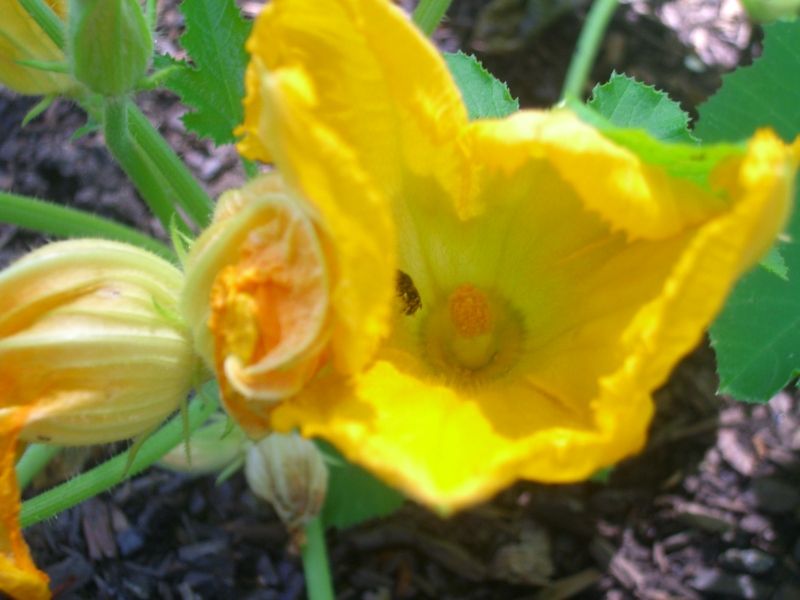
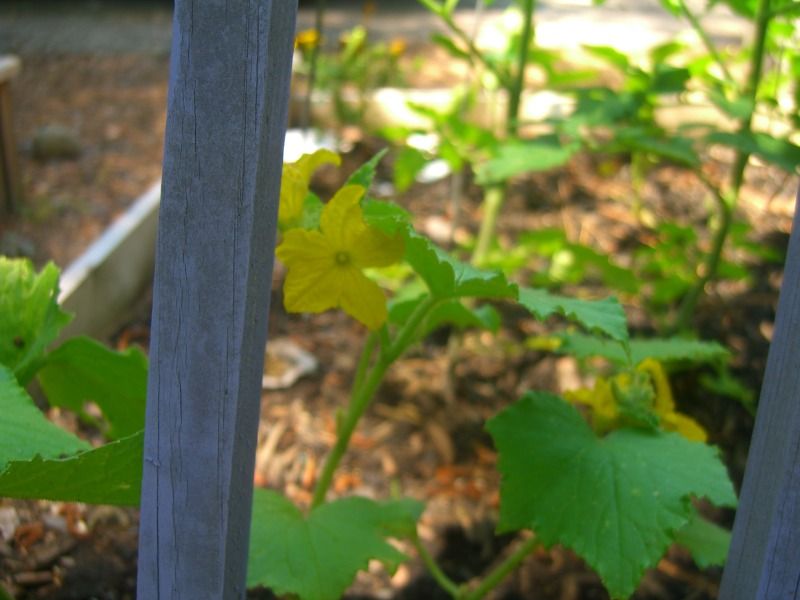
The squash and zucchini are blooming, and their leaves are getting bigger.  They've expanded even more since the above picture was taken!

square foot garden, tomato plant, tomatoes

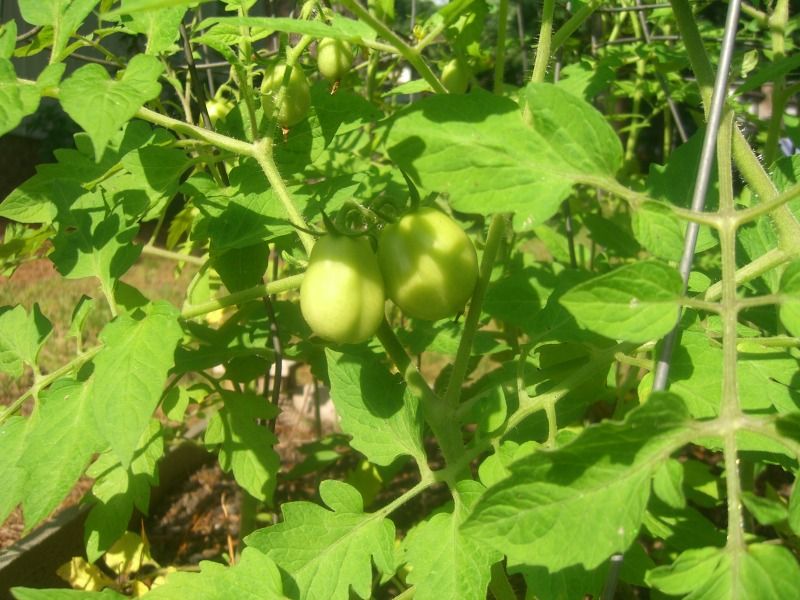
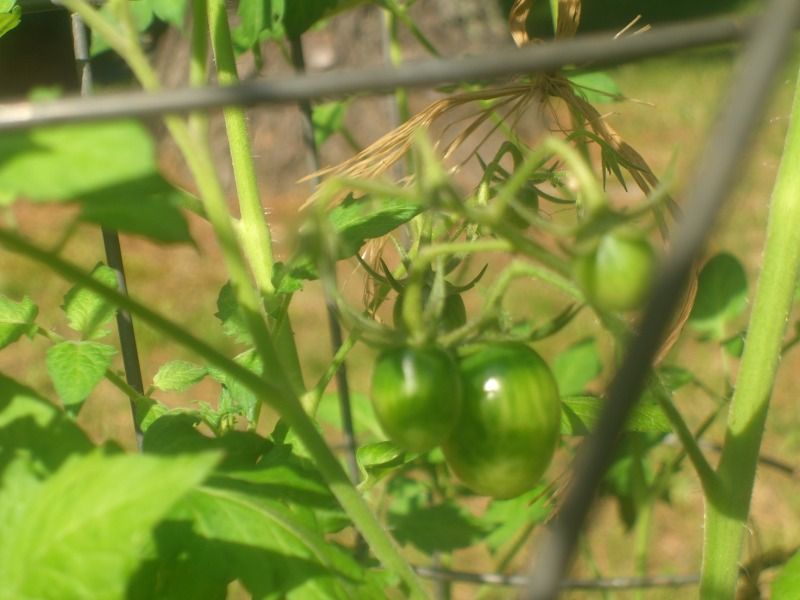
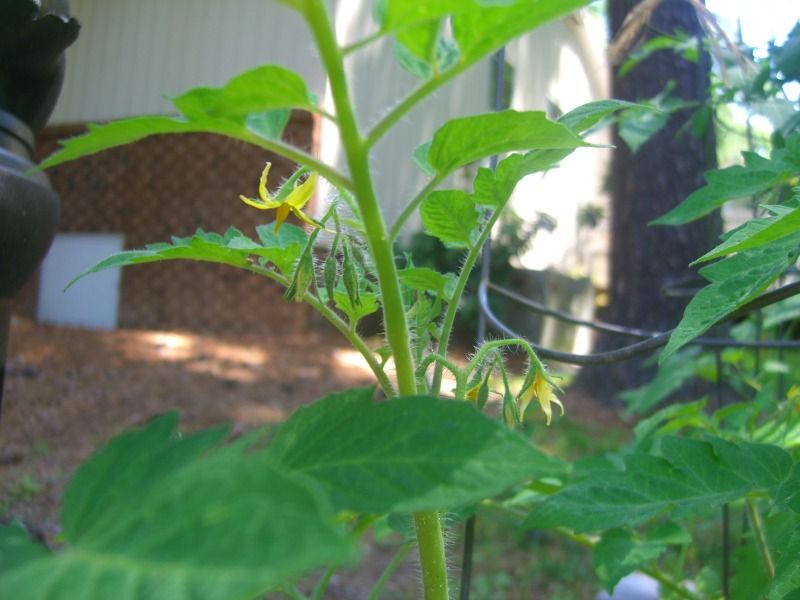
Starting to see some tomatoes!

square foot garden, slugs, beer trap

 Fearing the slugs were going after the zucchini plants, I put out a slug beer trap.  To my surprise, it worked!  I did feel a bit guilty the next day seeing them in the dish - Bless their little sluggy hearts!  But even more so grossed out by the sight of them - Ewww!  Thank goodness for my husband being willing to handle disposal.  Definitely a man job! :)

Mary Ellen      

Thursday, May 30, 2013

{Recipe Repost} Strawberry Vanilla Jam


strawberry vanilla jam, strawberry jam


It's strawberry season!  On Mother's Day, we took a trip out to Vollmer Farm in Bunn, NC, to pick local, organically grown strawberries.  The kids always enjoy spending time at the farm (especially the Back Forty playground!).  And back home, I enjoy turning some of our fresh picked bounty into yummy Strawberry Vanilla Jam!


Rinse, hull and slice your strawberries.  You will need 5 cups of crushed berries for the jam.  I add the sliced strawberries to my Vitamix and pulse quickly, working in several small batches until I have the needed amount.  


Add the crushed strawberries to a stainless steel saucepan along with 4 tablespoons of lemon juice, a 1/2 teaspoon of butter (helps to reduce foaming) and half a vanilla bean, split in half lengthwise.  Whisk in pectin (1 - 1 1/2 boxes or 9 tablespoons).  Bring to a full rolling boil over high heat, stirring frequently.   


Next, add 7 cups of sugar (all at once), stirring constantly.  Return the mixture to a full rolling boil that cannot be stirred down.  Boil hard, stirring constantly, for 1 minute.  Remove from heat.  Using a large slotted metal spoon, skim off any foam.  Remove the vanilla bean.

Nota Bene:  Visit the Fresh Preserving website for instructions on how to prep jars and lids and for basic water bath canning procedures.

Add hot jam to prepared canning jars, leaving 1/4 inch headspace.

Process jars in a water bath canner for 10 minutes, adjusting for altitude.  When processing time is done, turn off heat and remove the lid from canner.  Allow jars to rest in canner for 5 minutes.  Carefully remove jars from canner without tilting.  Place jars upright on a towel in a draft-free area and let cool, undisturbed for 24 hours.

After 24 hours, check lids for seal before placing in pantry.  If jars did not seal properly, refrigerate immediately or reprocess.  


Mary Ellen

Disclosure

Monday, September 24, 2012

Preserving the Season - Canning Pear Honey


Preserving the season - locally grown pears
Godwin's Orchards, Johnston County, NC

With the change in season, pears have made an appearance at our farmer's market.  Last year, I bought pears from my pastured egg lady.  But this year, her trees didn't produce.  Fortunately, the gentleman I buy apples from also has pear trees.  He offered me a great price on the pears, so I bought the entire basket right then and there!

Interestingly enough, I don't really like pears!  But, I do love pear honey - which is like applesauce (but with pears, of course!) and crushed pineapple.  And despite the name, there's no honey involved.  The finished product just has a golden, honey color - hence pear "honey".  

Pear Honey
original recipe can be found here

3lbs fresh pears, peeled, cored and chopped {you'll need about 7 lbs of whole pears}
3 cups sugar
1-8 oz. can of crushed pineapple in juice
1 tablespoon lemon juice

1.  Combine all ingredients in a large stainless steel saucepan.
2.  Bring to a boil, stirring occasionally.
3.  Simmer for 40 minutes.
4.  Drain some of the cooking liquid and using an immersion blender (or masher), grind pears to a thick, applesauce like consistency.


My new canner - an anniversary present!
This girl loves practical gifts for the home :)

5.  Spoon into prepared canning jars leaving 1/2 inch headspace. 
6.  Process in boiling water for 10 minutes.


I was able to make 7 half pint jars of pear honey - one of which was gifted to the gentleman from the orchid.  He's going to bring more pears to the market next weekend, so I'll be back in the kitchen canning very soon!


Attention Target shoppers...On my last Target trip, I found this box of 12 regular mouth canning lids with bands on clearance for $2.78.  That's the cheapest I've seen for this in our area.  Might be worth a look-see if you're in Target.  Also, tis' the season for discounted school supplies, backpacks and lunch boxes at Target.  Get a start on next year's school supply shopping or stock up for the rest of this school year!

Mary Ellen

Thursday, August 16, 2012

Canning Sliced Peaches (Hot Pack Method)


Local Peaches from the Sandhills of NC

Peach season is winding down in our area.  But, before they disappear from our market for the season, I wanted to try my hand at canning sliced peaches. 


To remove the skins, rinse the peaches then drop them in a pot of boiling water for a minute or until the skin starts to crack. Next, quickly move them to an ice bath.  The boiling did make the skins a little easier to remove.  Though mine didn't seem to come off as easy as the illustrations from here!  I probably should have left them in the boiling water a little bit longer.  After the skins are removed, pit and slice the peaches.  To prevent my sliced peaches from browning, I sprinkled them with Fruit Fresh (a produce protector containing ascorbic acid - Vitamin C).  


Next, prepare a simple syrup.  The Ball Complete Book of Home Preserving: 400 Delicious and Creative Recipes for Today recommends using a medium or heavy syrup for peaches canned using the hot pack method.

For medium syrup - 3 1/4 cups granulated sugar + 5 cups water
For heavy syrup - 4 1/4 cups granulated sugar + 4 1/4 cups water

Combine the sugar and water in a stainless steel saucepan.  Bring to a boil over medium-high heat, stirring until sugar is dissolved.  Reduce heat to low and keep warm until needed, taking care not to boil the syrup down.

Once the syrup is prepared, add sliced peaches and warm until heated through (mine took about 5 minutes).  


Using a slotted spoon, fill prepared canning jars with warmed peaches leaving a 1/2 inch headspace.  Then, ladel hot syrup into jars to cover the peaches leaving 1/2 inch headspace.  Remove air bubbles and adjust headspace if needed by adding hot syrup.  Wipe rim of jar, center lid and screw band down until fingertip-tight.

Process jars in a water bath canner - 20 minutes for pint jars and 25 minutes for quart jars.

This truly was small batch canning for me, as my 1/2 peck of peaches yielded only 2 pint jars of canned sliced peaches.    


Mary Ellen

Friday, July 20, 2012

Peach Oatmeal Crumble


Peach Oatmeal Crumble with vanilla ice cream


We've been head over heels for peaches lately!  Peach jam, peach pie, peach ice cream.  This easy peachy delight was something I whipped up on the spur of the moment.  I used two different recipes to create one awesome treat! 

First, I peeled and sliced some locally grown peaches and prepared them using the peach pie filling recipe.  I placed the peaches in a greased pie pan.  Next, I prepared about half the oatmeal mixture from the Pioneer Woman's Strawberry Oatmeal Bars recipe.  I made these bars for the Fourth of July and they were absolutely delicious!  For my crumble, I mixed together 1 stick of butter, 1 cup of flour, 1 cup of oatmeal, 1/2 cup brown sugar and 1 teaspoon of baking powder.  I topped my peaches with the crumble mixture and baked at 350 degrees for 30 minutes.  

Enjoy!

Mary Ellen   

Monday, July 16, 2012

Ice Cream Without An Ice Cream Maker!


Homemade Peach Ice Cream

One of my favorite memories as a child, was my Momma making ice cream during the summer.  So, when I saw this recipe in my latest issue of Woman's Day for making ice cream without an ice cream maker, I knew I had to try it! 

Start with the basic recipe for vanilla ice cream:

2 cups heavy cream
1-14 oz. can sweetened condensed milk
1-1/2 teaspoons pure vanilla extract

Using an electric mixer, beat the cream, condensed milk and vanilla until thick, stiff peaks form (about 3 -5 minutes).

To add fruit:

-Puree fresh or frozen fruit in a food processer until you have 1 cup of fruit puree.  Strain through a fine sieve if desired.  {I used local peaches from our farmer's market, pureed in my Vitamix.  No straining required!}

-Fold half of the fruit puree into the cream mixture until combined.  Spoon the remaining puree over the cream mixture and fold to create swirls. 


-Transfer to a loaf pan or freezer safe container.  Gently tap to distribute mixture and get rid of air bubbles.  Cover and freeze for at least 8 hours, and up to 2 weeks. 

The kids LOVED this!  I will definitely be making this again and trying different flavors!

Mary Ellen


Monday, June 25, 2012

Crockpot Recipe - Chicken Enchilada Soup


Chicken Enchilada Soup

As a working mom and home keeper, it is still important to me to have a warm, healthy, homemade dinner on the table for my family each night.  It can definitely be a challenge with the rush of the evenings after work!  But, my crockpot is an invaluable tool when it comes to meal times.  That's why I was so excited when the ladies of Living On A Dime released their new e-book, Easy Crockpot Recipes and Menus!

This Chicken Enchilada Soup recipe was an absolute winner and a must try!

Chicken Enchilada Soup
from Easy Crockpot Recipes and Menus
by Jill Cooper

1 lb. boneless, skinless chicken breast
1-15 oz. can of black beans, drained
1-14 oz. can of diced tomatoes, including juice
1-14 oz. can of chicken broth
1-10 oz. can of enchilada sauce {I made my own using the recipe from Dining On A Dime}
1-4 oz. can of diced green chiles
1 onion, chopped
1 tsp. salt and 1/4 tsp. of black pepper {I omitted both}

{These following are listed as optional spices, but I added them all in!}
2 bay leaves
3 cloves of garlic, minced
1 tsp. ground cumin
1 tsp. chili powder
1/4 cup chopped fresh cilantro
{I also added in local, organically grown zucchini and yellow squash (diced) from the farmer's market.  Add 1-2 cups additional broth if adding veggies.}

Place chicken in a slow cooker first and then add the rest of the ingredients.  Cook on low for 6 hours {I cooked this on high for 4 hours}.  Transfer the chicken to a large plate and shred the meat with two forks.  Return the chicken to the slow cook and continue cooking for 30 minutes to 1 hour.


To serve, place in a bowl and top with crushed corn chips, tortilla chips, sour cream or cheese.  You could also add a scoop of cooked rice to the bowl first.

You'll find this and other recipes in the new e-book, Easy Crockpot Recipe and Menus.  Today is the last day to pick up a copy of the e-book for 40% off!

Easy Crockpot Recipes and Menus


Disclosure

Monday, June 18, 2012

More Berry Pickin' at Vollmer Farm


Over the weekend, we headed back out to Vollmer Farm in Bunn, NC for some more berry picking.  Nothing is better than local, organically grown berries!


The blackberries were ready


And so were the blueberries!


The strawberries were winding down.  But what we did find still on the vine, was SO SWEET!


The fruits of our labor!


On the way back from the farm, we stopped by Sonic.  A departure from our healthy eating, but a special FIRST TIME treat for all of us!  We made it just in time for half price drinks.  Daddy ordered  a round of slushies and limeades for everyone!


From farm to the table - The Pioneer Woman's Grilled Chicken Salad with Feta, Corn & {fresh picked local} Blueberries

Mary Ellen

Thursday, June 7, 2012

Garden Highlights...and Lowlights!


I love going out to my little backyard garden and seeing the changes each day!  Little bundles of Roma tomatoes are now hanging from my tomato plants.  Last year, my Roma tomatoes were plagued with blossom end rot.  But this year, everything seems to be going just as it should!    


The grape tomatoes have also made an appearance


Little cucumbers have formed on the vine


And it looks like our first zucchini is also on the way!

While the tomatoes, cucumbers and zucchini seem to be moving right along, my pepper plants aren't doing much.  It appears that slugs have been chewing on the leaves and even eating the tops of the stems.  That could explain why I've never been able to grow peppers!  Also, the rosemary and marigolds have pretty much died off.  I've grown rosemary in a container for several years now and never had it die so soon!  Oh, the ups and downs of gardening!

Mary Ellen

Thursday, May 24, 2012

Garden In Bloom


The garden is filled with blooms!


Zucchini blossoms


Cucumbers


Grape tomatoes


Bell peppers

There are even a few little green tomatoes forming - yay!

Even though this gardening season is still young, I've been thinking ahead to next year.  I shared with Dave my idea of expanding to three squares and he agreed!  So next year, I'm planning on having two squares for vegetables and one square dedicated entirely to fresh herbs!  I can't wait!

Mary Ellen


Tuesday, April 17, 2012

Small Batch Canning - Strawberry Vanilla Jam


Local, organic strawberries from Vollmer Farm

Canning is becoming one of my favorite ways to preserve seasonal goodness!  Even as a working mom, I've found canning to be a wonderful (and useful) hobby that I can do in the evenings after work or on the weekends.  Last Friday to kick off my weekend, I decided to can some jam using some of the strawberries we picked from Vollmer Farm.  I used the recipe for "Traditional Strawberry Jam" from the Ball Complete Book of Home Preserving.  


The recipe calls for 5 cups of crushed strawberries.  Instead of crushing the berries by hand with a potato masher, I used my Vitamix.  Just a quick pulse on low up to speed level 2 or 3 until the strawberries were finely chopped, but not pureed. 


For something different, I tried one of the variations listed with the recipe.  I added half of a Madagascar vanilla bean, split lengthwise, to the strawberries while they cooked.  The bean is removed prior to transferring the jam to jars.  But, it imparts a subtle vanilla flavor to the jam.
 

The best part of canning strawberry jam, having homemade lemon pancakes topped with strawberry vanilla jam the next day for breakfast!  YUM!


Strawberry Vanilla Jam
Recipe from Ball Complete Book of Home Preserving
(Can also be found online here at the Ball Fresh Preserving website)

5 cups crushed strawberries
1/4 cup lemon juice
1 box of pectin {I always use 1 full box of pectin and half of a second}
7 cups sugar
half of a vanilla bean, split lengthwise
1 tsp butter {optional - but adding butter to the berries prior to cooking cuts down on the amount of foam generated during boiling}

 -Combine strawberries, lemon juice and vanilla bean in a 6 to 8 quart saucepan.  Stir in pectin until dissolved.  Bring strawberries to a full rolling boil over high heat, stirring constantly.

-Add in entire amount of sugar and stir to dissolve.  Bring mixture back to a full rolling boil.  Boil hard for 1 minute, while stirring constantly.  Remove from heat and skim off any foam.  Remove vanilla bean.

-Add hot jam to canning jars leaving 1/4 inch headspace.  Process in a water bath canner for 10  minutes, adjusting for altitude.  When processing is done, remove jars from canner and allow to cool for 24 hours.  Check seal before placing cooled jars in the pantry.  If jars did not seal properly, the jam must be refrigerated immediately or reprocessed.

*This recipe yielded 5 half pint jars and 2 pint jars of jam for me.

Mary Ellen


(Note:  This post contains affiliate links.  Read my disclosure policy here).


Friday, April 13, 2012

Picking Strawberries at Vollmer Farm


Thanks to a warm winter, strawberry season came early to our area this year!  And for us, that means a trip out to Vollmer Farm in Bunn, NC.


Yummy strawberries!


Dave and the kids picking berries


I guess Ashleigh sneakily took a picture of me picking as well!  It was a cool, somewhat breezy day.  But I braved the elements in my dress and heels :)


After our buckets were filled, the kids took to the playground.  The pirate ship is always a favorite.  Clayton is king of the world!


So is getting a push from Daddy on the swings!


And of course the grand finale, a stop by the ice cream shop for scoops of homemade ice cream!  I had banana pudding - so delicious!  Tastes just like banana pudding but in a waffle cone!


Now, its time to work these strawberries into some jars of jam.  I'll also freeze a portion to use in smoothies.  The rest, we'll just enjoy their fresh, sweet goodness!

Mary Ellen