
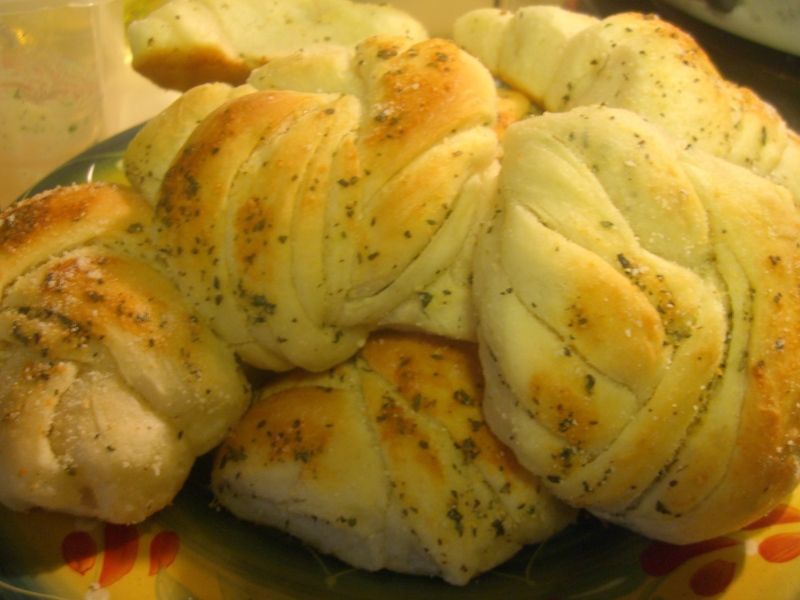
Homemade Garlic Knots
Recipe from Simply Scratch
Lately in the kitchen, I've been working on my bread making skills. I do well when it comes to things like cinnamon buns and pizza dough. But, I want to expand to rolls and loaves. And have a finished product that is actually soft and edible and not like little bread bricks! I've come across a couple of tips and wonderful recipes that have put me on the path to bread making success!
Helpful tips -
*from someone who is by no means an expert, but learning!
(1) Proof your yeast - This is probably something everyone else already does when making breads, but I've always neglected this very crucial first step! Before I add my yeast-water mixture to my flour, I add one or two teaspoons of sugar or honey to my measuring cup, add the warmed water called for in the recipe, then add my yeast and allow it to sit for 5 minutes. The yeast gets all bubbly and foamy, which means it's alive and ready to go!
(2) Mixer attachments - Instead of starting out with the dough hook attachment on my KitchenAid mixer, I now use the paddle attachment to blend the flour and any other dry ingredients. I also use the paddle attachment while I'm pouring the yeast-water mixture into the flour. Once its incorporated, then I switch over to the dough hook and mix until the dough pulls away from the sides of the bowl.
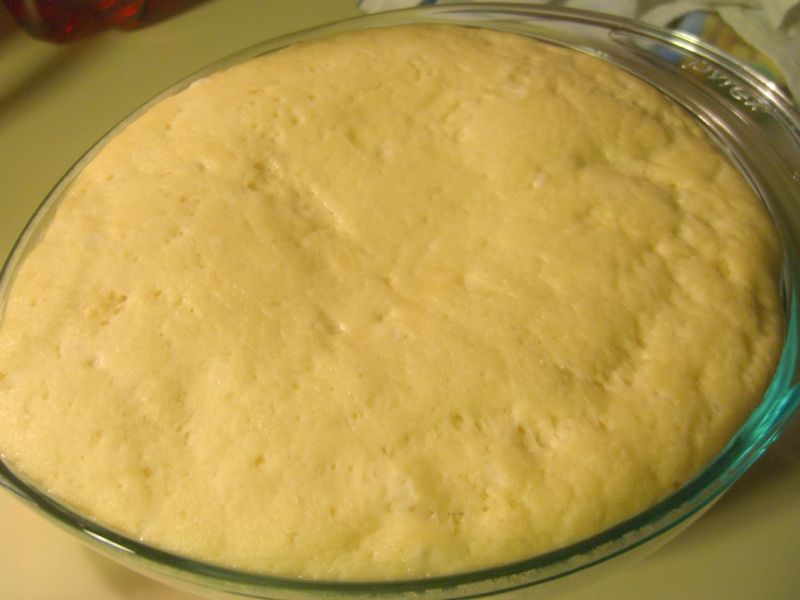
(3) Getting dough to rise - One of my biggest difficulties with past bread making attempts was getting my dough to rise. I tried sitting my dough on the dryer while it was running (didn't work). Even placed my mixer bowl with the dough in a preheated over (worked, but dried my dough out). Now, instead of placing both the dough and the bowl in the oven, I just warm the bowl itself!
I actually happened upon this by accident. One of the bread making books I've been reading suggested using a glass bowl instead of the metal mixing bowl for rising. I was making dough and had just run a load of dishes in the dishwasher, so my glass bowl was still very warm. That dough rose beautifully! So now while I'm mixing the dough, I place a glass bowl in a cold oven and set it to preheat to the lowest setting (which is 150 degrees on our oven). When the dough is ready, I take the warmed bowl out of the oven, pour a little olive oil in the bowl, put the dough in, roll it around to coat it with oil, then cover the bowl with a cloth napkin and dish towel. My dough rises great every time now!
A few words of caution - DO NOT place a cold glass bowl in a warm oven. The glass could shatter (which you probably already knew!). Also, my glass bowl is PYREX brand and oven safe.
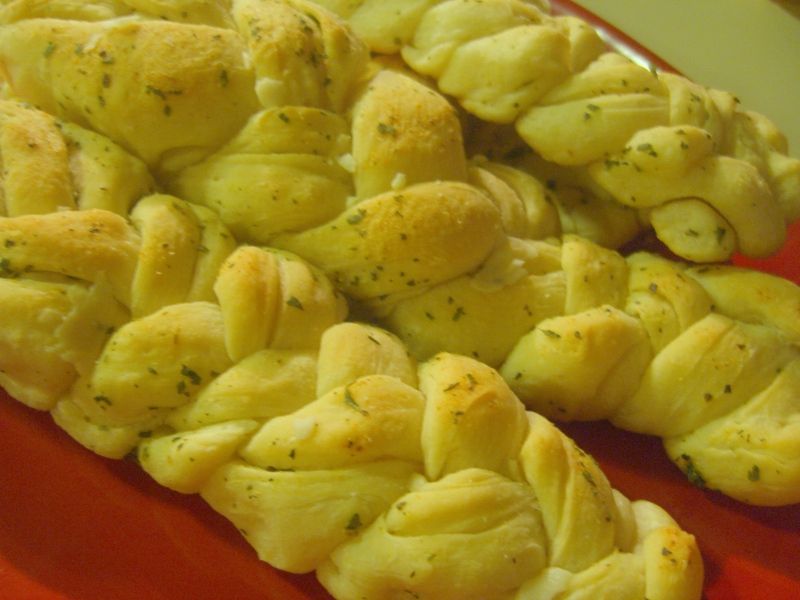
Homemade Garlic Braids
Great recipes -
I loved this recipe for Garlic & Herb Breadsticks from Simply Scratch. The first time I made the recipe, I shaped my rolls into knots. The next time, I did the braids pictured above. The rolls were a big hit with the family and made me feel like a bread making pro!
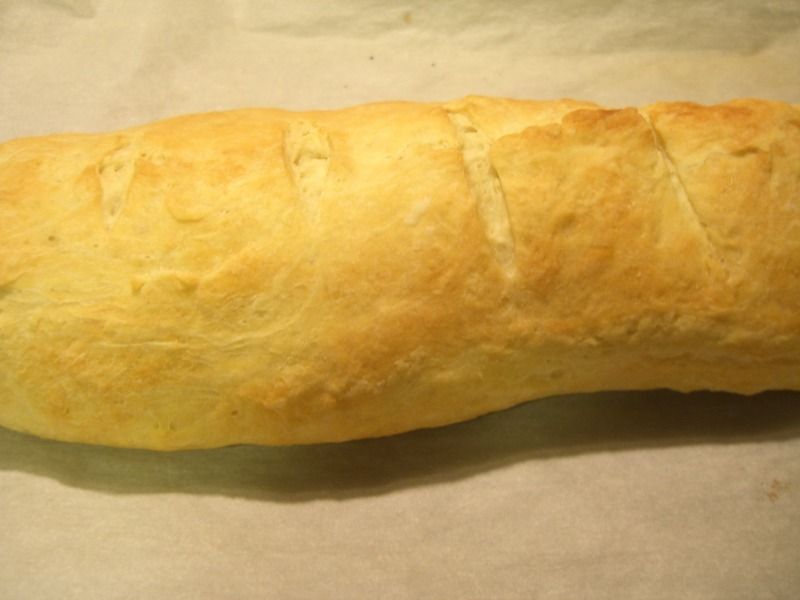
Homemade French Bread
Also from Simply Scratch, this recipe for Easy Homemade French Bread. It really was easy and the bread turned out great. Just as good as what I typically buy from Trader Joe's. But made by my own hands!
Happy Bread Making!
Mary Ellen
Good tips! I am SUCH a newbie with this stuff. I have so many recipes on Pinterest and LOVE watching the Food Network, but I don't actually spend much time in the kitchen. I tried making French bread once and it turned out pretty well. Those Garlic braids look delicious and will be a great addition the next time we have pasta (my brother LOVES garlic bread with lasagna). :)
ReplyDeleteLove your new look! Gets me thinkin' about more
ReplyDeletewhite space on my blog...
Can I just say that I want to be your kid?! I'm a college student who has been perusing your blog for the last couple of days and it seems that you have the best food and best bonding activities for your family. That's just great!
ReplyDeleteYou're an example of what skills I should learn and develop to become a capable mother and wife to my future family. And I'd like to thank you for that.
Thanks Madison! :)
ReplyDeleteMary Ellen
Thanks Karen! I thought I would try something a little new!
ReplyDeleteMary Ellen
Thanks Jazz! Hope you enjoy the recipes!
ReplyDeleteMary Ellen
I can't wait to try this.
ReplyDeleteOne of the best tips I ever received about getting the consistency of the dough correct is to push your finger into the dough. You want the dough to feel like it's going to stick to your fingers, but it doesn't. If it's too wet, the dough will stick to your fingers which means you need to add a little more flour, allowing a few minutes for the flour to get absorbed by the moisture in the dough before testing again. If the dough doesn't feel like it's trying to stick to your fingers, then the dough is too dry and you need to add a tiny bit of water at a time until the dough begins to feel like it's trying to stick to your fingers/hand. My yeast/bread products turn out perfectly every time now.
ReplyDeleteSusan