Showing posts with label Menu Planning. Show all posts

Sunday, April 14, 2013

Busy Day in the Kitchen


A busy day in the kitchen....homemade cinnamon rolls this morning for breakfast.  The Pioneer Woman's Blackberry Cobbler this afternoon.
 

Currently, making 20 batches of slime (yes, slime!) for Clayton's class project.  And later for supper, Indian Roast Chicken from Bal Arneson (The Spice Goddess).


What's cooking in your kitchen today?  

Mary Ellen


Saturday, March 30, 2013

{Repost} Dijon Pineapple Glazed Ham Recipe

 
Bone-in Ham with Dijon Pineapple Glaze
 
I've shared this recipe before as it is a family favorite and my go-to recipe for glazed ham.  But, with Easter right around the corner (tomorrow!!!) I wanted to make it available again.  I still have to run out to the store and buy a ham myself.  Hopefully, there are still some left!
 
 
Dijon-Pineapple Glaze
(adapted from Kraft Foods recipe)

1 cup brown sugar

1/2 cup maple syrup or honey (I've also used the glaze packet included with the ham for the syrup)

1/4 cup Dijon mustard

1 can crushed pineapple, with juice (I chop up frozen pineapple or canned pineapple chunks in my Vitamix)

1 tablespoon corn starch

whole cloves

Maraschino cherries, halved (optional)

 Heat oven to temperature listed in cooking directions included with the ham.  Mix syrup, sugar and mustard until blended.  Spread a portion of the glaze over the ham.  Add cloves and cherries to the top of the ham.  Bake ham according to directions.

Before the ham is done cooking, combine remaining glaze with corn starch and crushed pineapple in a saucepan.  Bring to a boil over medium-high heat.  Cook and stir over medium-low heat for 5 minutes or until thickened.  Serve sauce alongside ham.
 
Mary Ellen

Disclosure


Tuesday, January 1, 2013

Black-Eyed Peas & Collard Greens


A New Year's Day tradition - black-eyed peas slow cooked with kielbasa and ham (for good luck).  Collard greens seasoned with ham (for wealth).  Rice (for good health) and cornbread made from scratch (just because it tastes good!). 


Good cooking like this makes my husband glad he married a Southern girl!
Happy New Year!
Mary Ellen

Monday, December 24, 2012

Visit from Grandma-claus!


Yesterday, we were visited by my husband's mother, his siblings and their significant others.  It's always great to see his brothers and sister as they live out-of-state.  And of course, the kids always look forward to visits from Grandma!


Grandma came bearing gifts!
 
 
She brought tablets
 

and toys, much to the delight of the little ones!
 
 
The kids even got a chance to meet an actual Major League baseball player!
 
My gift is in the mail - literally!  It was delayed in all the holiday shipping.  But, I can't wait to get cooking with my new Le Creuset cookware set :)
 
Since the family came yesterday, today has been quiet and restful.  I've been busy in the kitchen prepping for our Christmas Dinner.  Making Sweet Potato Casserole and Jalapeno Coleslaw to go along with our Dijon-Pineapple Glazed Ham.  Later, we'll take a ride around and look at Christmas lights.  That's when the "elf activity" starts to pick up around our house :)  Every Christmas Eve, an elf stops by to drop off a new pair of pajamas and an ornament for the kids.  A reminder they should get to bed early tonight!
 
Mary Ellen


Wednesday, November 28, 2012

Got Thanksgiving Leftovers? Make A Pot Pie!


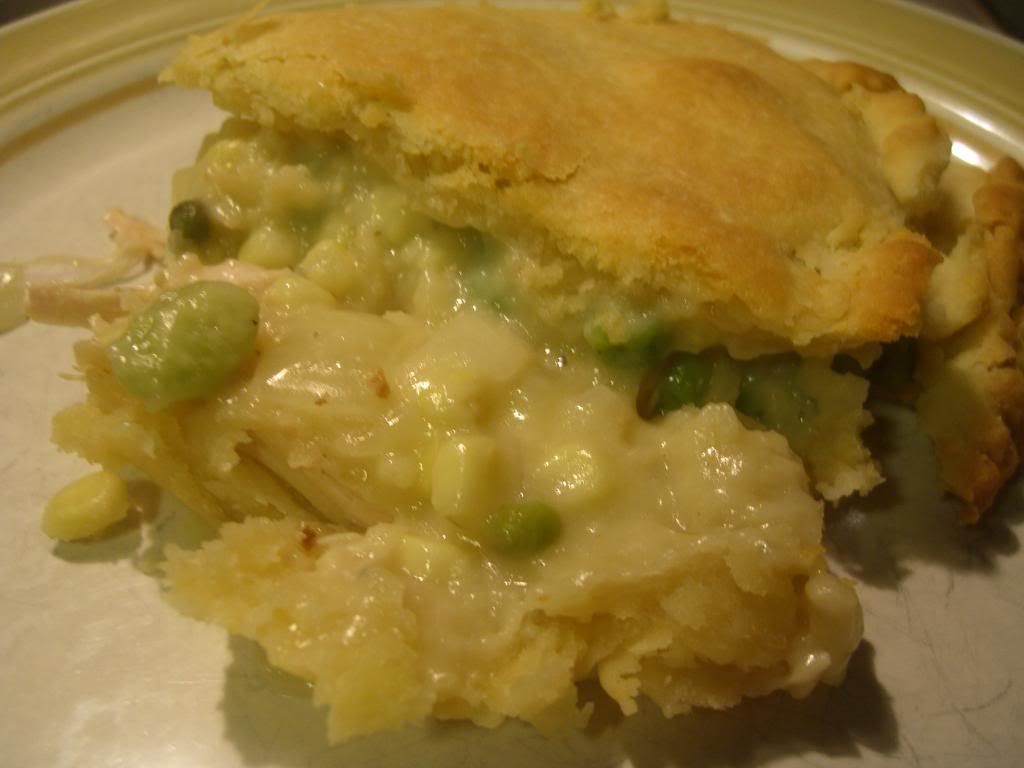
Homemade Turkey Pot Pie

Need to clear out some Thanksgiving leftovers from your refrigerator?  Then make a pot pie!  

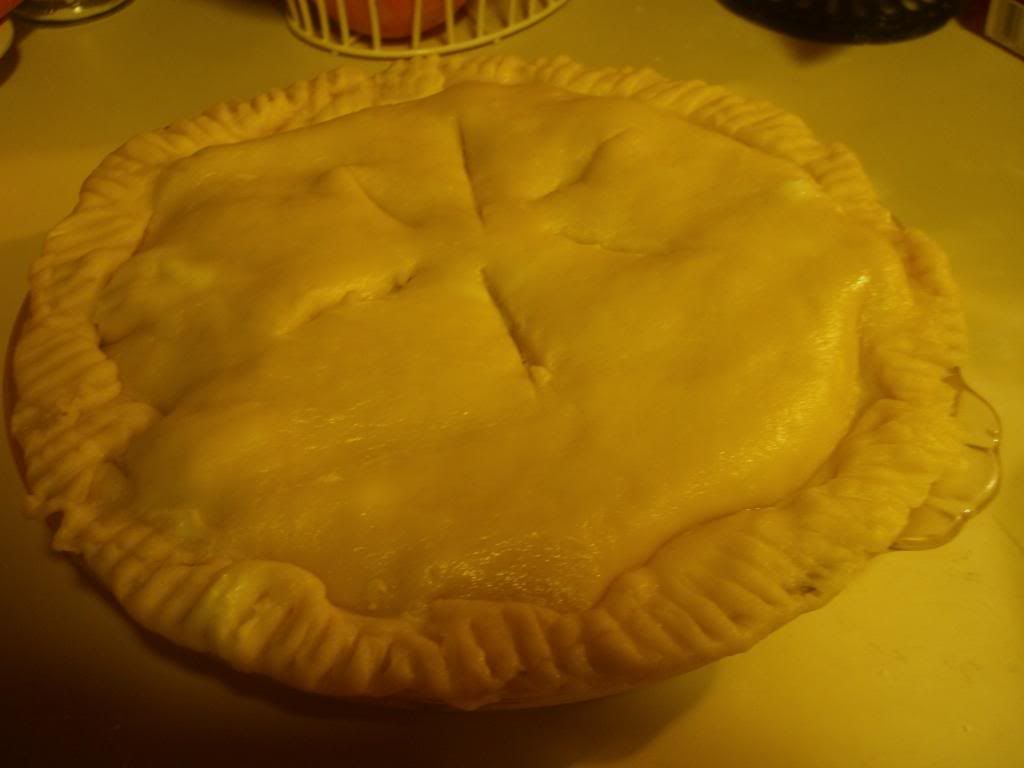
For the crust, I used my favorite pie crust recipe - The Perfect Pie Crust recipe posted at The Pioneer Woman.  The recipe makes two crusts.  So, I made my pot pie with both a top and bottom crust.  Of course, you could just do a top crust for the pot pie and save the other crust for a dessert recipe!

To prepare the filling:
Adapted from this recipe

1 medium onion, diced
1/3 cup butter
1/3 cup all purpose flour {or corn starch}
1 3/4 cup chicken broth
2/3 cup milk
black pepper and garlic powder, to season
shredded turkey meat
leftover or frozen vegetables {I used green peas, frozen corn, frozen lima beans and also leftover brown rice}

In a saucepan over medium heat, saute diced onion in butter until tender.  Add flour (or corn starch) and stir.  Slowly stir in chicken broth and milk.  Simmer over medium-low heat until sauce thickens.  Add seasonings to taste.  Remove from heat and set aside.

*If you wish, you can add your veggies to the sauce while it thickens.  Since I was using vegetables that were already cooked or frozen, I did not add them in at this point because the baking time would be sufficient enough to cook them.


To bottom pie crust, add shredded turkey and veggies.  Then, pour the warmed sauce over the meat and vegetables.  Add top pie crust, seal edges and cut slits in top.

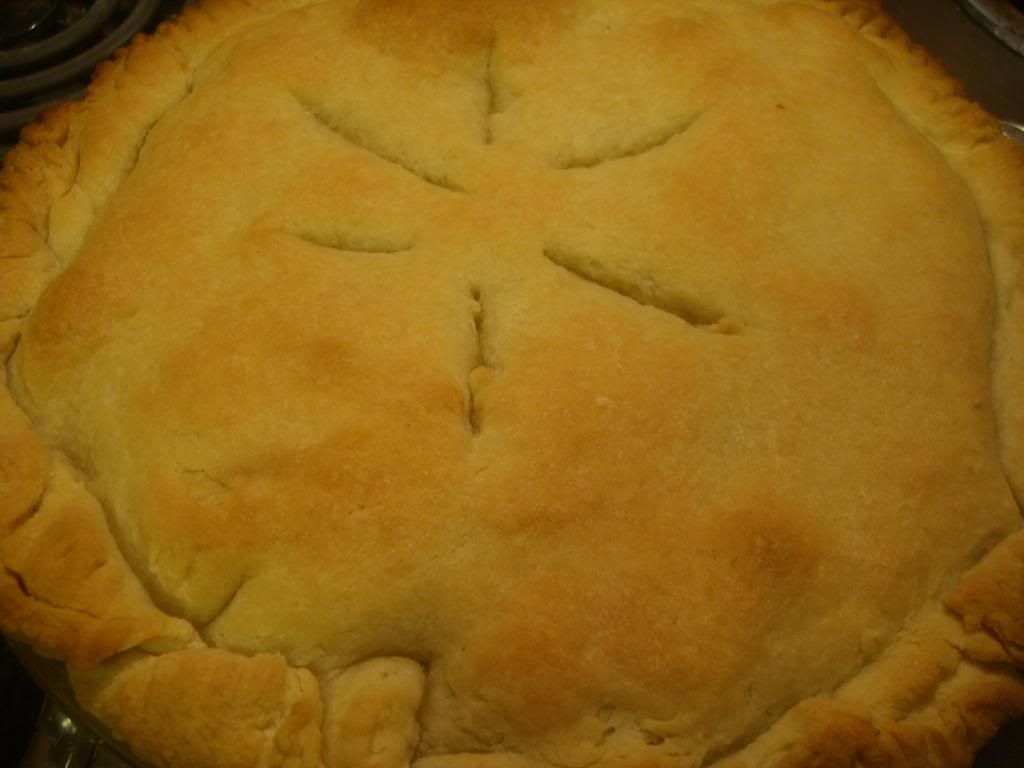
Bake in a preheated 425 degree oven for 30 to 35 minutes, or until crust is golden and the filling is bubbly.


Enjoy!

Mary Ellen

Wednesday, November 21, 2012

Happy Thanksgiving!


Wishing you a Happy Thanksgiving!
 
*****
 
Our Thanksgiving Meal:
 
{Brine recipe included}
 
Crockpot Cornbread Stuffing (A Year of Slow Cooking)
 
 
Brown Rice
 
Buttered Peas & Carrots
 
Pecan Pie (Pioneer Woman)
 
{used Perfect Pie Crust recipe for both pies}
 
 
Mary Ellen


Friday, November 16, 2012

Living On A Dime Christmas Sale!


Give the gift of frugality for the Holidays!  Buy a package (3 copies) of the Dining On A Dime Cookbook for only $11 each during the Living On A Dime Christmas Sale!  That's a savings of 50% off the retail price.  Get a copy for yourself and two to give as gifts!  The Dining On A Dime Cookbook is an essential asset in any frugal kitchen with over 1200 recipes and money saving tips.  All individual print books are also 40% off during the sale.

As if these incredible sale prices weren't enough of a reason to check out the Christmas Sale, when you take advantage of Living On A Dime's Christmas Sale today, you'll also get 16 Free Bonus Items Valued at $92.75, including:

* A Delightful Collection of 10 Holiday Recipes e-Books

* A Year of Snacks e-book from Christine Steendahl at TheMenuMom.com

* 8 Easy Gardening Tips for Growing Better Tomatoes e-report from Faylee James at FoodShoppingOnABudget.com

* Menu Planning For Busy Moms e-course from Mary Ann Kelley at Menus4Moms.com

* 101 Lunchbox Ideas e-book from Emma Henry at FamilyMealsAndCookingTips.com

* Practicing Hospitality - Household Entertaining from Kemi Quinn at WellKeptPlanners.com

* Thrifty Christmas Ideas e-book from Angela Billings at ThriftyHomemaker.com


 This great sale ends Tuesday, November 20th at midnight.  Hurry and get your copies today!

*****


Mary Ellen


Sunday, October 28, 2012

Fall Recipe - Beef & Vegetable Soup


Beef & Vegetable Soup
 
A blustery, Fall day filled with lots of playing and jumping into leaf piles, calls out for a warm, hearty dinner!
 
Inspired by Mom Saving Mom's Hamburger Vegetable Soup recipe - but altered to make it more like my Momma's recipe!
 
1 lb ground, local grass-fed beef
3-4 potatoes, peeled and diced
3 carrots, peeled and sliced
1 medium onion, diced
1/2 cup brown rice
1-28 oz. can, diced tomatoes
 
the following, I don't really measure - just go by sight and preference
some frozen corn
some frozen peas
some frozen cut okra
tomato or vegetable juice
 
to season, dried oregano, dried basil, 2 bay leaves and black pepper
 
In a large pot, brown beef then drain.  Add in potatoes, onions and carrots.  Then add the diced tomatoes, frozen vegetables and rice.  Add enough tomato or vegetable juice to cover the ingredients.  Add in the seasonings, then cook over medium low heat until potatoes and carrots are done.  I usually let this simmer on the stove on low heat for 2 hours.  And the smell of the soup cooking, fills the whole house!  During cooking, stir and add more vegetable juice or water as needed. 
 
Mary Ellen 


Tuesday, August 21, 2012

Bread Making


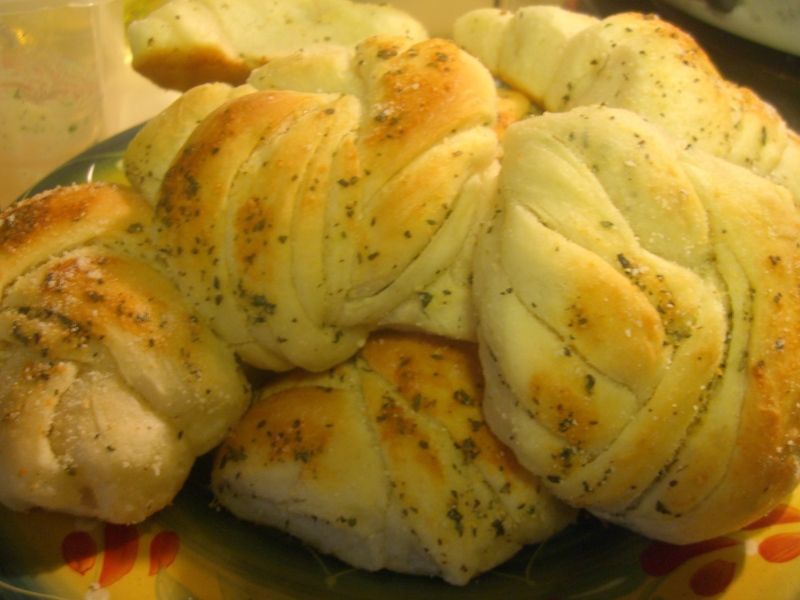
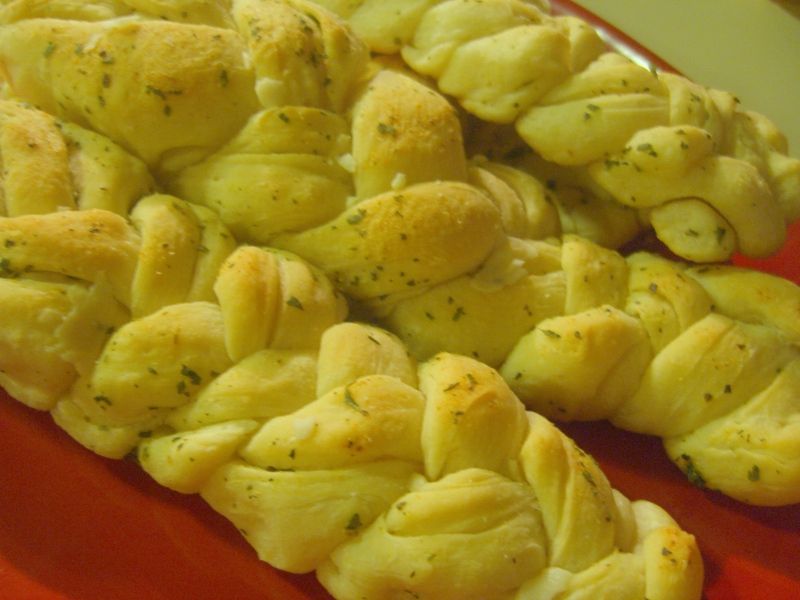
Homemade Garlic Knots
Recipe from Simply Scratch

Lately in the kitchen, I've been working on my bread making skills.  I do well when it comes to things like cinnamon buns and pizza dough.  But, I want to expand to rolls and loaves.  And have a finished product that is actually soft and edible and not like little bread bricks!  I've come across a couple of tips and wonderful recipes that have put me on the path to bread making success!    


Helpful tips -
*from someone who is by no means an expert, but learning!

(1) Proof your yeast - This is probably something everyone else already does when making breads, but I've always neglected this very crucial first step!  Before I add my yeast-water mixture to my flour, I add one or two teaspoons of sugar or honey to my measuring cup, add the warmed water called for in the recipe, then add my yeast and allow it to sit for 5 minutes.  The yeast gets all bubbly and foamy, which means it's alive and ready to go!

(2) Mixer attachments - Instead of starting out with the dough hook attachment on my KitchenAid mixer, I now use the paddle attachment to blend the flour and any other dry ingredients.  I also use the paddle attachment while I'm pouring the yeast-water mixture into the flour.  Once its incorporated, then I switch over to the dough hook and mix  until the dough pulls away from the sides of the bowl.

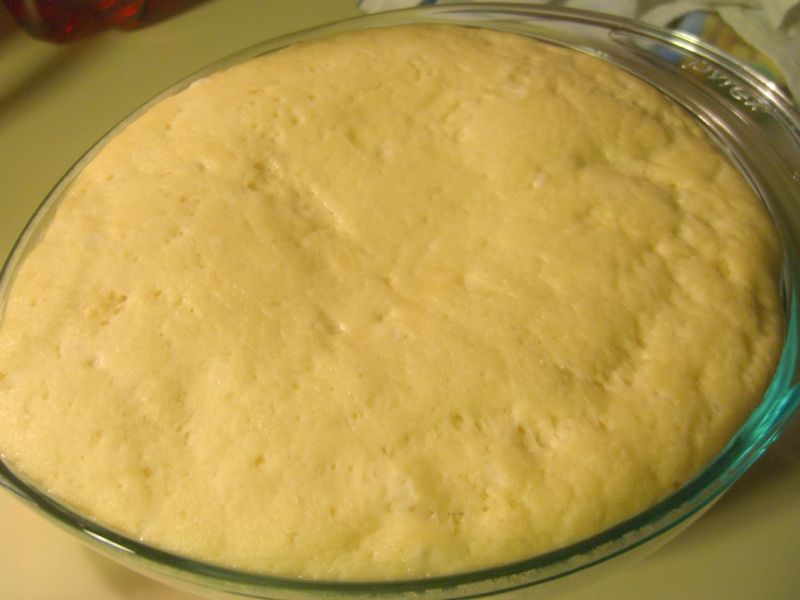
(3) Getting dough to rise - One of my biggest difficulties with past bread making attempts was getting my dough to rise.  I tried sitting my dough on the dryer while it was running (didn't work).  Even placed my mixer bowl with the dough in a preheated over (worked, but dried my dough out).  Now, instead of placing both the dough and the bowl in the oven, I just warm the bowl itself! 

I actually happened upon this by accident.  One of the bread making books I've been reading suggested using a glass bowl instead of the metal mixing bowl for rising.  I was making dough and had just run a load of dishes in the dishwasher, so my glass bowl was still very warm.  That dough rose beautifully!  So now while I'm mixing the dough, I place a glass bowl in a cold oven and set it to preheat to the lowest setting (which is 150 degrees on our oven).  When the dough is ready, I take the warmed bowl out of the oven, pour a little olive oil in the bowl, put the dough in, roll it around to coat it with oil, then cover the bowl with a cloth napkin and dish towel.  My dough rises great every time now!

A few words of caution - DO NOT place a cold glass bowl in a warm oven.  The glass could shatter (which you probably already knew!).  Also, my glass bowl is PYREX brand and oven safe.     


Homemade Garlic Braids

Great recipes - 

I loved this recipe for Garlic & Herb Breadsticks from Simply Scratch.  The first time I made the recipe, I shaped my rolls into knots.  The next time, I did the braids pictured above.  The rolls were a big hit with the family and made me feel like a bread making pro!


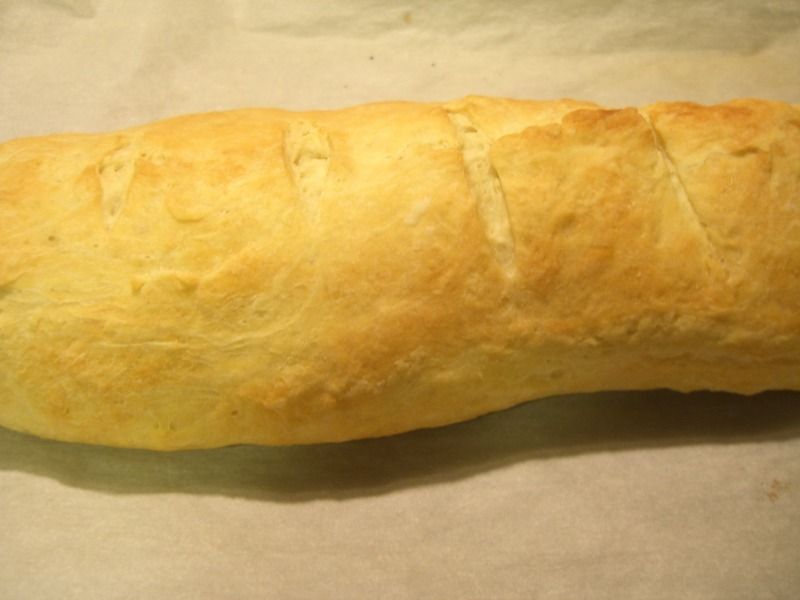
Homemade French Bread

Also from Simply Scratch, this recipe for Easy Homemade French Bread.  It really was easy and the bread turned out great.  Just as good as what I typically buy from Trader Joe's.  But made by my own hands!

Happy Bread Making!

Mary Ellen  

Friday, July 20, 2012

Peach Oatmeal Crumble


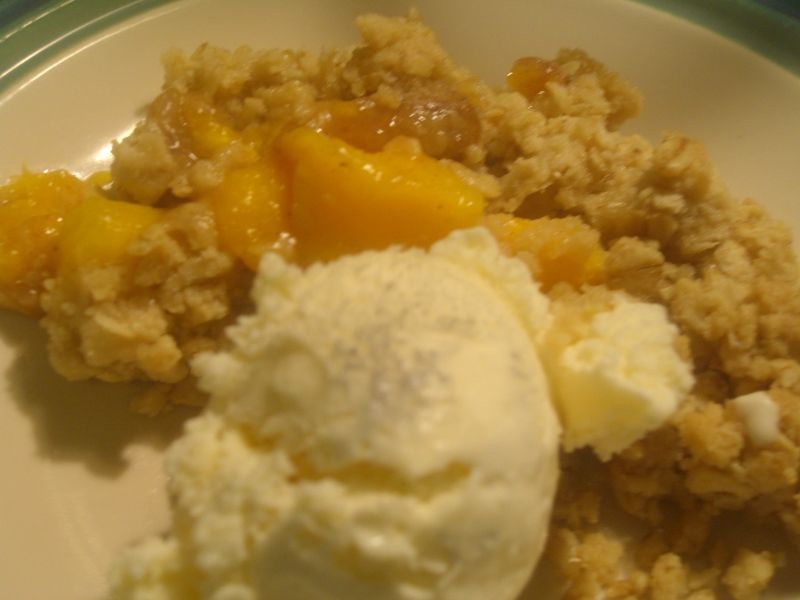
Peach Oatmeal Crumble with vanilla ice cream


We've been head over heels for peaches lately!  Peach jam, peach pie, peach ice cream.  This easy peachy delight was something I whipped up on the spur of the moment.  I used two different recipes to create one awesome treat! 

First, I peeled and sliced some locally grown peaches and prepared them using the peach pie filling recipe.  I placed the peaches in a greased pie pan.  Next, I prepared about half the oatmeal mixture from the Pioneer Woman's Strawberry Oatmeal Bars recipe.  I made these bars for the Fourth of July and they were absolutely delicious!  For my crumble, I mixed together 1 stick of butter, 1 cup of flour, 1 cup of oatmeal, 1/2 cup brown sugar and 1 teaspoon of baking powder.  I topped my peaches with the crumble mixture and baked at 350 degrees for 30 minutes.  

Enjoy!

Mary Ellen   

Friday, July 13, 2012

From Scratch - Peach Pie Recipe


The morning after my peach jam canning session, I mentioned to Dave that maybe I'd make another batch of jam with the remaining peaches.  To which he replied, "Or maybe a peach pie".  Then, I pondered peach salsa.  And once again his response was, "Or maybe peach pie".  At that moment, I got it!  Peach pie wasn't merely a suggestion, but a big hint, hint!  So, when I came in from work that evening, I busied myself in the kitchen working on a peach pie completely from scratch!


For the pie crust, I used The Pioneer Woman's Perfect Pie Crust recipe.  I've made it many times before for her Flat Apple Pie recipe and it is so good!  And very easy to make!  I divided the dough into two, wrapped in plastic wrap and refrigerated for about 30 minutes.  While the crust was chilling, I made the pie filling.

Peach Pie Filling:

5 -6 medium peaches, peeled, pitted and sliced
1/2 cup all-purpose flour
1/2 - 3/4 cup sugar
1/2 teaspoon cinnamon

Combine peaches, flour, sugar and cinnamon in a bowl.  Set aside.

I took the crusts from the refrigerator and rolled them out on a floured counter.  I took one of the crusts and placed it in my greased pie pan.  As you can see from the photos, my crust crimping skills could use some work!  Add the peach mixture to the pie pan.  Using my pizza cutter, I cut the second crust into strips and formed a lattice pattern over the peaches.  Not all of them were the same width, but it turned out okay!

Bake the pie at  375 degrees for 30 to 40 minutes. 


Slice and serve with vanilla ice cream and make your peach pie loving husband extremely happy!  Dave especially loved the filling.  He said it was just sweet enough to still allow the natural sweetness of the peaches to come through. 

Hope you have a PEACHY weekend!

Mary Ellen

Thursday, July 12, 2012

Quick Meals for Working Moms - Crockpot Stuffed Peppers


Stuffed Green Peppers
in the Crockpot

Stuffed Green Peppers

1 (10 oz.) package frozen corn kernels
1 (15 oz.) can red kidney beans, drained and rinsed
1 (14.5 oz.) can diced tomatoes
1/4 cup salsa
1/4 cup chopped onions
1 1/2 cup cooked rice {I used leftover brown rice}
1 teaspoon Worcestershire sauce
1/4 teaspoon salt {I omitted the salt}
1/2 teaspoon black pepper
2 cups shredded Cheddar cheese, divided
6 green peppers, with the tops removed and seeded

Combine all ingredients except 1/4 cup cheese and green peppers.  Stuff peppers.  Arrange peppers in a slow cooker.  Cover.  Cook on low 6 -8 hours (or on high 3 - 4 hours).


Sprinkle with 1/4 cup cheese during the last 30 minutes.  Makes 6 servings.


Easy Crockpot Recipes and Menus


Monday, June 25, 2012

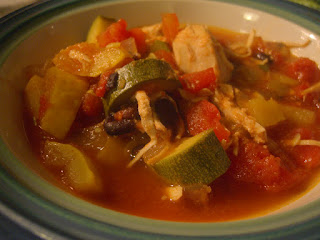
Crockpot Recipe - Chicken Enchilada Soup


Chicken Enchilada Soup

As a working mom and home keeper, it is still important to me to have a warm, healthy, homemade dinner on the table for my family each night.  It can definitely be a challenge with the rush of the evenings after work!  But, my crockpot is an invaluable tool when it comes to meal times.  That's why I was so excited when the ladies of Living On A Dime released their new e-book, Easy Crockpot Recipes and Menus!

This Chicken Enchilada Soup recipe was an absolute winner and a must try!

Chicken Enchilada Soup
from Easy Crockpot Recipes and Menus
by Jill Cooper

1 lb. boneless, skinless chicken breast
1-15 oz. can of black beans, drained
1-14 oz. can of diced tomatoes, including juice
1-14 oz. can of chicken broth
1-10 oz. can of enchilada sauce {I made my own using the recipe from Dining On A Dime}
1-4 oz. can of diced green chiles
1 onion, chopped
1 tsp. salt and 1/4 tsp. of black pepper {I omitted both}

{These following are listed as optional spices, but I added them all in!}
2 bay leaves
3 cloves of garlic, minced
1 tsp. ground cumin
1 tsp. chili powder
1/4 cup chopped fresh cilantro
{I also added in local, organically grown zucchini and yellow squash (diced) from the farmer's market.  Add 1-2 cups additional broth if adding veggies.}

Place chicken in a slow cooker first and then add the rest of the ingredients.  Cook on low for 6 hours {I cooked this on high for 4 hours}.  Transfer the chicken to a large plate and shred the meat with two forks.  Return the chicken to the slow cook and continue cooking for 30 minutes to 1 hour.


To serve, place in a bowl and top with crushed corn chips, tortilla chips, sour cream or cheese.  You could also add a scoop of cooked rice to the bowl first.

You'll find this and other recipes in the new e-book, Easy Crockpot Recipe and Menus.  Today is the last day to pick up a copy of the e-book for 40% off!

Easy Crockpot Recipes and Menus


Disclosure

Tuesday, June 19, 2012

{NEW!} Easy Crockpot Recipes & Menus E-Book


Easy Crockpot Recipes and Menus

Do you find that you're often so busy that it's hard to find the time or the energy to cook? Do you end up hitting the fast food places or even more expensive restaurants more than you should? Eating out is one of the biggest causes of personal debt.  But after a busy day, who wants to come home and spend the time to cook dinner?

Living On A Dime's new Easy Crockpot Recipes and Menus e-Book has been prepared especially for busy moms! It's full of easy recipes and menus that can help you save a lot of money and time preparing delicious crockpot meals in minutes so you won't have to wonder what to cook when you get home.

Simply pick one of the pre-made menus, take a couple minutes to toss some ingredients into a slow cooker and know that you're saving a lot on your food spending. Not only that, you won't have to spend the extra time it takes to drag everyone to that fast food place... and you KNOW what a chore that can be when you're tired.

When you check out the new Easy Crockpot Recipes and Menus e-Book today, you can get it for $7.77, 40% off the regular price.  Don't forget - the special 40% off deal is only good until Monday! Make your meal planning easier-- check it out now!


Easy Crockpot Recipes and Menus

Monday, May 7, 2012

Homemade Seasonings


Save money in the kitchen with these homemade spice mixes from Living On A Dime!


*****

Save Money With Homemade Seasonings
by Tawra Kellam
http://www.LivingOnADime.com

Seasoned Salt
I use this one in almost every meal I cook. It saves so much time having everything in one shaker!
8 Tbsp. salt
3 Tbsp. pepper
1/2 Tbsp. onion powder
1/2 Tbsp. garlic powder
Mix all ingredients in a bowl. Store in an airtight container.

Taco Seasoning
6 tsp. chili powder
4 1/2 tsp. cumin
5 tsp. paprika
1/4 tsp. oregano
3 tsp. onion powder
2 1/2 tsp. garlic powder
1/8-1/4 tsp. cayenne pepper
Mix all ingredients and store in an airtight container. One teaspoon of homemade taco seasoning equals 2 teaspoons store-bought.

Italian Seasoning
1/4 cup dried basil
2 Tbsp. dried marjoram
2 Tbsp. dried oregano
2 Tbsp. dried coriander
2 Tbsp. dried thyme
2 Tbsp. dried rosemary
2 tsp. garlic powder
1 tsp. sugar
Combine all the ingredients. Store in an airtight container in a cool dark place for up to 3 months.

Cajun Seasoning
1 Tbsp. paprika
2 1/2 tsp. salt
1 tsp. onion powder
1 tsp. garlic powder
1 tsp. cayenne pepper
3/4 tsp. white pepper
3/4 tsp. black pepper
1/2 tsp. thyme leaves, dried
1/2 tsp. oregano, dried
Combine ingredients and mix well. Store in an airtight container.

Fajita Seasoning
1 Tbsp. cornstarch
2 1/2 -3 tsp. chili powder (vary according to how spicy you like it)
1 tsp. salt
1 tsp. chicken bouillon granules
1 tsp. paprika
1/2 tsp. onion powder
1/2 tsp. garlic powder
1/4 tsp. cumin

All Purpose Seasoning
3 Tbsp. paprika
2 Tbsp. salt
2 Tbsp. dried parsley
2 tsp. onion powder
2 tsp. garlic powder
1 tsp. ground black pepper
1 tsp. dried oregano
1 tsp. dried basil
1 tsp. dried thyme
1/2 tsp. celery salt
Mix all ingredients together and store in an air tight container.Use on hamburgers, steak, chicken, fish and vegetables.

Tawra Kellam and Jill Cooper are frugal living experts and the authors of the Dining On A Dime Cookbook. Dining On A Dime will help you save money on groceries and get out of debt by cooking quick and simple homemade meals. For free tips & recipes visit http://www.LivingOnADime.com , sign up for our free Living On A Dime Newsletter and learn to save more!


Saturday, May 5, 2012

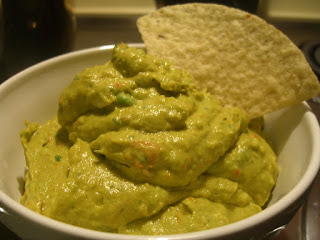
Easy Guacamole from Gluten Free Goddess


Tonight we're enjoying this Easy Guacamole recipe from Gluten Free Goddess.  Made even easier with my Vitamix!


Just avocados, grape tomatoes, garlic, lime juice and fresh cilantro straight from my back porch herb garden.
    
This guacamole recipe tastes so light and fresh.  And no onions!  Definitely a favorite in our house for snacking!

Happy Cinco de Mayo!

Mary Ellen


Tuesday, April 3, 2012

Easter Sunday Dinner & Sweet Potato Casserole Recipe


Our Easter Sunday Dinner


Sweet Potato Casserole with Pecans (recipe below)

Oven Roasted Asparagus

Organic Brown Rice

Dinner Rolls

and for dessert - Homemade Lemon Bars

*****

Sweet Potato Casserole with Pecans

This recipe is from our State Farmers' Market Restaurant and calls for cooked fresh pumpkin.  However, I make it using sweet potatoes because you can always find good NC sweet potatoes in season year round!

3 cups mashed fresh sweet potatoes (peel, dice and boil sweet potatoes until tender; then mash)
1 cup sugar
1/2 cup brown sugar
3 eggs
1/2 cup milk
1 teaspoon vanilla
1/2 stick melted butter
1 teaspoon cinnamon
1/2 teaspoon nutmeg

Topping:

1 cup brown sugar
1/4 cup all purpose flour
1/2 stick melted butter
1 cup chopped pecans

{For topping, mix together sugar, flour, butter, then add pecans}

Add mashed sweet potatoes to a large mixing bowl.  To the bowl add sugars, eggs, milk, vanilla, cinnamon, nutmeg and butter.  Beat until smooth.  Pour into 2 quart casserole dish.  Cover with topping mixture and bake at 350 degrees for 30-40 minutes.

Mary Ellen


Image Credit

Friday, March 30, 2012

Meal Ideas for Lent - Pioneer Woman's Pantry Pasta


I saw this meatless pasta dish on an episode of the Pioneer Woman's Food Network show.  A simple, quick dish she threw together using ingredients right from her pantry.  Artichokes, olives, pesto and cheese.  The recipe calls for jarred pesto since the show was about using items from the pantry.  But after the first time I made fresh pesto, I swore I would never go back to jarred or prepared pesto ever again!  So I did make my own pesto for this dish using another Pioneer Woman recipe.  And instead of feta cheese, I used chevre (goat cheese) since that's what I had on hand!   

Mary Ellen


Friday, March 23, 2012

Meal Ideas for Lent - Yellow Split Pea Dal


Yellow Split Pea Dal

Add a little international flare to your meatless Lenten meals with this recipe for Yellow Split Pea Dal.

Note:  This recipe is from a cookbook I checked out from our public library.  I neglected to write down the name of the book (silly me!), but I believe it's from Easy Indian Cooking by Suneeta Vaswani.

2 cups yellow split peas
2 cups + vegetable broth
1 medium diced onion
Peeled & diced ginger (a small piece)
2 - 3 garlic cloves, minced
2 teaspoons cumin
2 teaspoons tumeric
Red pepper flakes, to taste

Saute onions, ginger and garlic in olive oil over medium heat.  When onions have become translucent, add red pepper flakes, cumin and tumeric.  Stir to combine.  Add broth and yellow split peas.  Simmer for 30 - 40 minutes until peas are done.  Add more broth (or water) as needed during the cooking process.  Serve alone or over brown rice with Naan.

Mary Ellen

Tuesday, March 20, 2012

Quick Meals for Working Moms - Spaghetti with Homemade Meat Sauce


Whole Wheat Spaghetti with 
Homemade Meat Sauce

When I think about quick meals to make in the evenings after work, spaghetti always comes to mind!  It's not very time intensive and the kids love it.  But instead of reaching for a jarred pasta sauce, why not make your own?  It's simple and it gives you more control over the ingredients.  My go-to homemade meat sauce is this recipe featured on the Naturally Knocked Up blog (cute name!).  I do make a few changes to make it more to our liking.  I omit the olive oil, Worchestershire sauce and Parmesan cheese.  If we add Parmesan, it's usually sprinkled on after the pasta is plated.  I also leave out the minced onions and use onion powder instead.  Ashleigh is convinced she is allergic to onions (she's not!) and will not eat anything containing visible onion pieces.  And when I'm feeling particularly thrifty, instead of two-15oz. cans of tomato sauce, I'll use one can + a can of water.  The sauce will thicken as the water cooks down.  This recipe serves our family of 6, with one serving usually left over.

Enjoy!

Mary Ellen